Virtual Home Staging: Complete Guide (Cost, Before-After, Tools, vs Traditional)
Most people discover virtual home staging when they’re frustrated with how staging usually works today.
- Traditional home staging – coordinate a local stager, move in furniture, pay rental and labour, then wait for install and removal.
- Older virtual staging tools – upload photos into complicated software, tweak lots of settings, and still get results that look like obvious renderings.
Both approaches can work, but they come with real trade-offs:
- Turnaround can be days instead of minutes.
- Per-image or per-property costs add up quickly.
- Results often don’t match from room to room, which hurts your brand and buyer trust.
This guide looks at a third option: AI virtual staging on Stager Go, using a template-based workspace with dedicated modes for real estate photos. It shows you how to:
- Understand what modern AI virtual home staging actually is.
- Compare AI virtual staging with traditional staging and older virtual staging tools.
- See realistic before-after examples and style options.
- Understand pricing, turnaround time, and workflow in practice.
- Decide when AI virtual staging is the best fit for your listing.
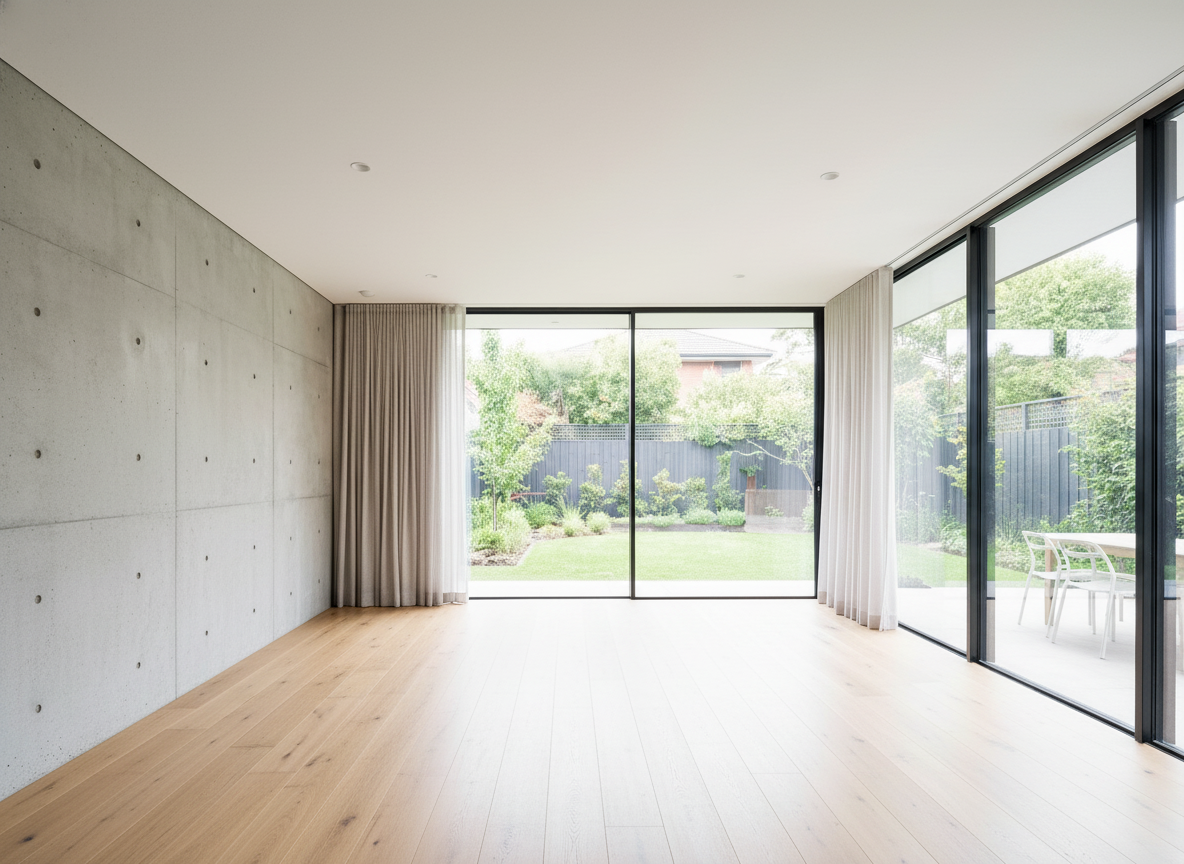
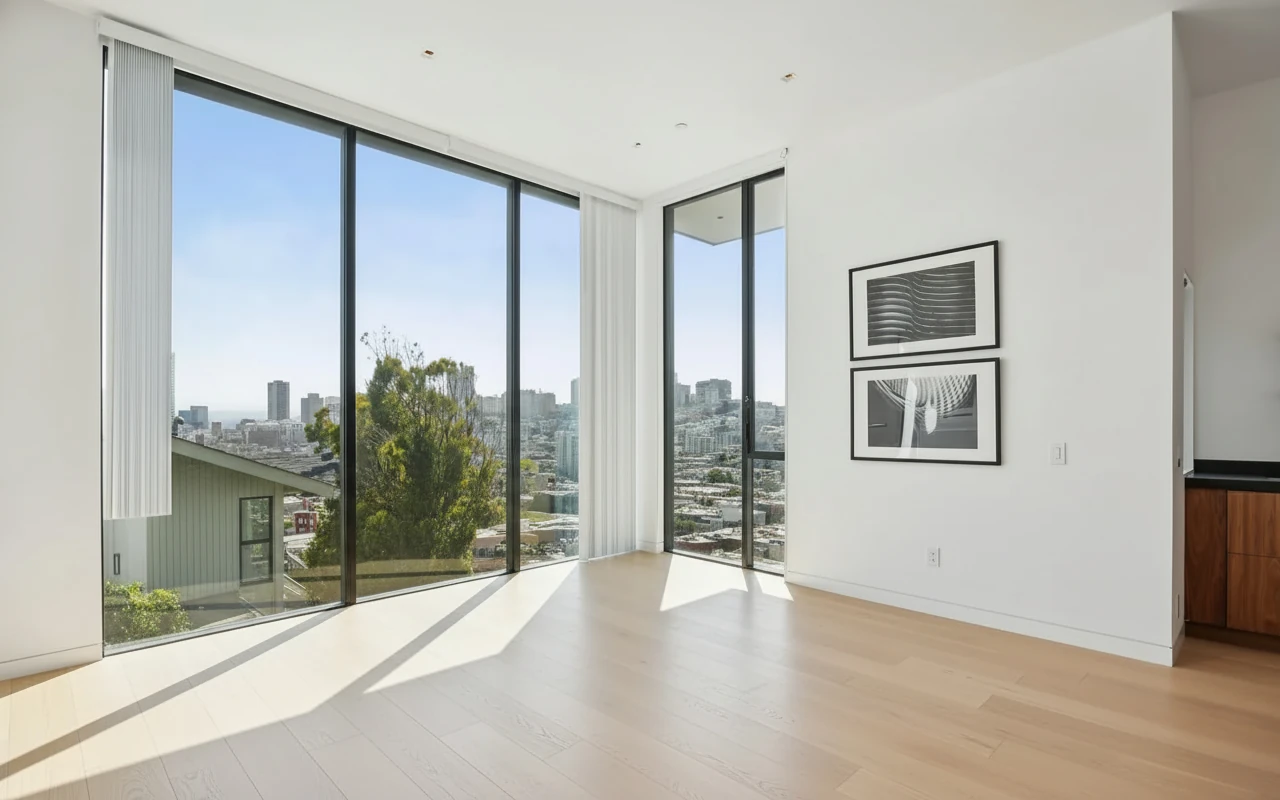
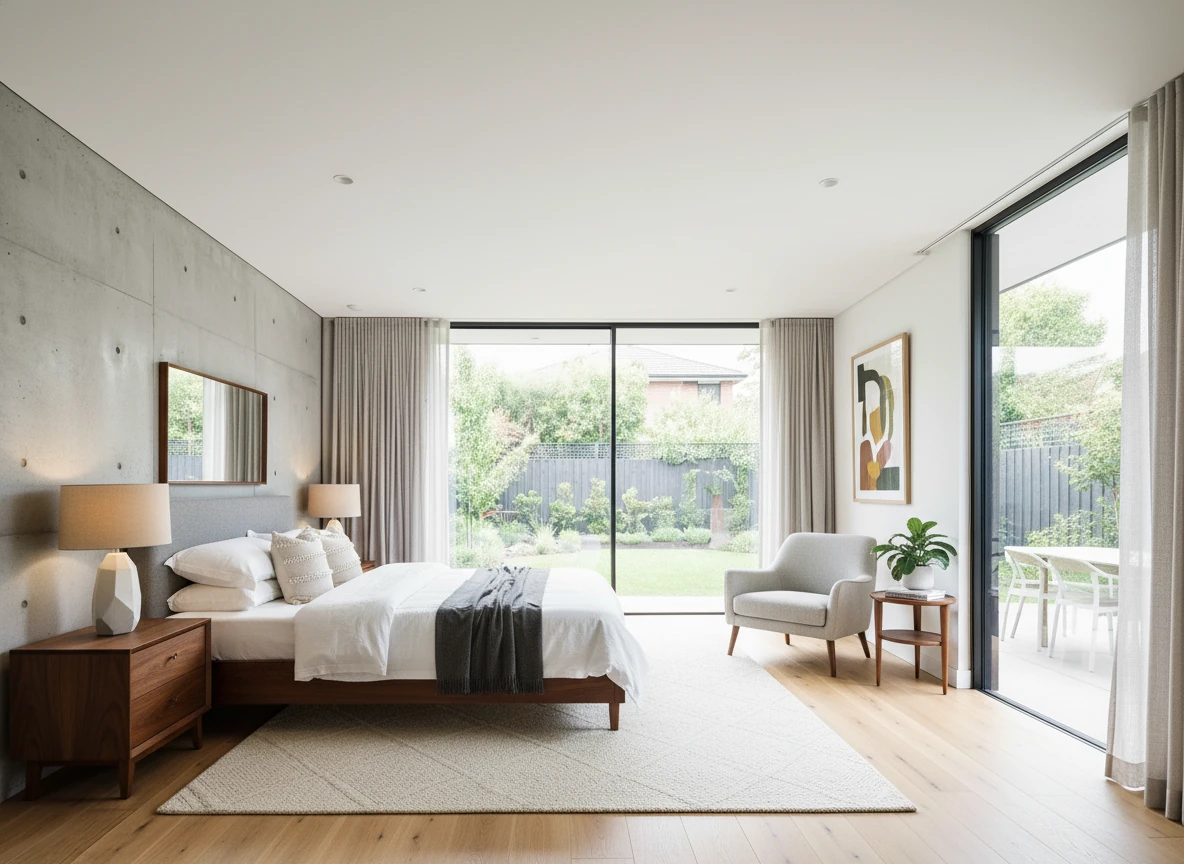
Virtual Staging • Luxury • Bedroom
What Is Virtual Home Staging (and How Does AI Change It)?
At a high level, virtual home staging means furnishing and styling rooms digitally instead of bringing in physical furniture.
You start with a real estate photo of an empty or outdated room. Software then adds furniture, decor, lighting, and layout that match the space and your buyer profile.
Traditionally, this has been done in two main ways:
- Manual outsourcing to human editors – you send files to a retouching team, describe the style over email or PDF, then wait 24–72 hours for results and revisions.
- Older virtual staging / 3D tools – you upload an image into a complex editor, click through many settings, or even build 3D scenes before seeing a result.
Both can work, but they tend to be slow, expensive, and inconsistent from room to room.
AI virtual staging on platforms like Stager Go changes this by using a template-based workspace designed specifically for real estate:
- You upload a photo, choose a mode (virtual staging, item removal, photo enhancement, or day-to-dusk), pick a room type and style, and let the AI handle layout and details.
- You can lock in a look once, then reuse it across an entire property with templates.
- Results typically come back in seconds instead of days, so you can stage a full set of listing photos in one sitting.
Compared to traditional staging with physical furniture:
- No furniture delivery – everything happens from the photo.
- No on-site crew – no installers, movers, or breakdown days.
- No storage costs – nothing is physically moved or stored.
Compared to older virtual staging tools and manual editors:
- You don’t need to learn a complicated 3D workflow.
- You don’t have to tweak dozens of technical settings.
- Pricing is usually per image or per credit, so you only pay for the images you actually use.
The result is a set of MLS-ready, ultra-realistic staged images created through an AI-first workflow that answers the core questions buyers and sellers have: What will this space look like furnished, how fast can I get the images, and is it worth it compared to traditional staging?
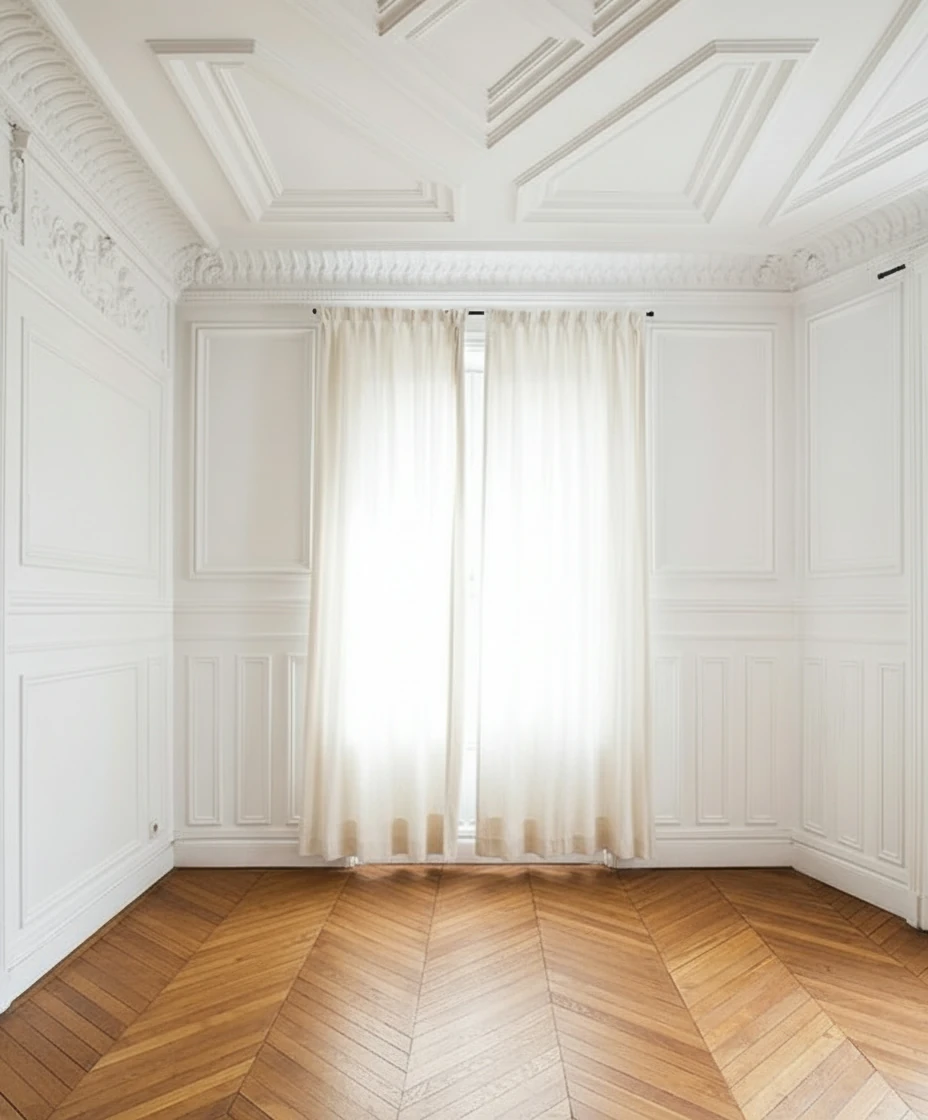
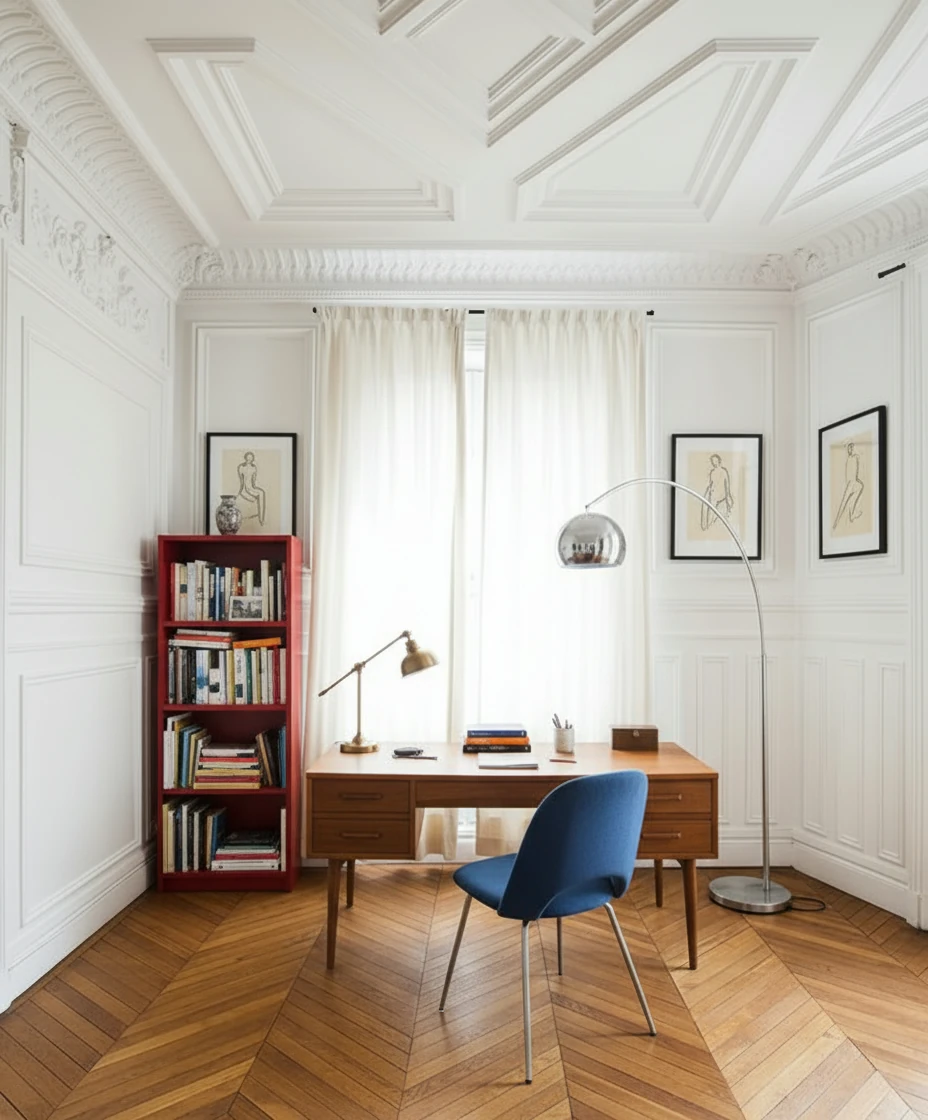
Furnish the study with a mid-century wooden desk centered in front of tall, cream-draped windows, paired with a blue-upholstered chair featuring metal legs. Place a vintage desk lamp and neatly arranged books and stationery on the desk. To the left, add a red open bookshelf filled with books and decorative objects. Include a tall arched chrome floor lamp curving over the desk for dramatic lighting. Hang two framed figure drawings symmetrically on either side of the window. Keep the ornate white paneled walls and chevron wood floor exposed for a refined Parisian atmosphere.
How Virtual Home Staging Works Step by Step
1. Start With Clean Input Photos
Good results start with good base photos:
- Shoot straight, level images of each room.
- Make sure the room is reasonably lit.
- Remove obvious clutter if possible.
If the room is messy or the lighting is poor, run the photo through item removal and photo enhancement tools first so the AI has a clean canvas to work with.
2. Choose Room Type and Style
Inside the virtual staging workspace, you’ll typically select:
- Property type – residential vs commercial.
- Room type – living room, bedroom, kitchen, office, etc.
- Design style – modern, Scandinavian, minimalist, luxury, etc.
This tells the AI what kind of furniture layout and decor to generate.
3. Generate and Refine
Once the settings are picked:
- Click generate to create the staged image.
- Review the result and request a new variation if needed.
- Keep the best version for your listing and marketing materials.
Before-After Examples & Style Options
Virtual staging isn’t just one look. You can match the design to the target buyer and neighborhood.
Coastal Condo Living Room
- Clean lines, neutral palette, large sofa, coastal style decor.
- Ideal for coastal condos and lifestyle buyers.
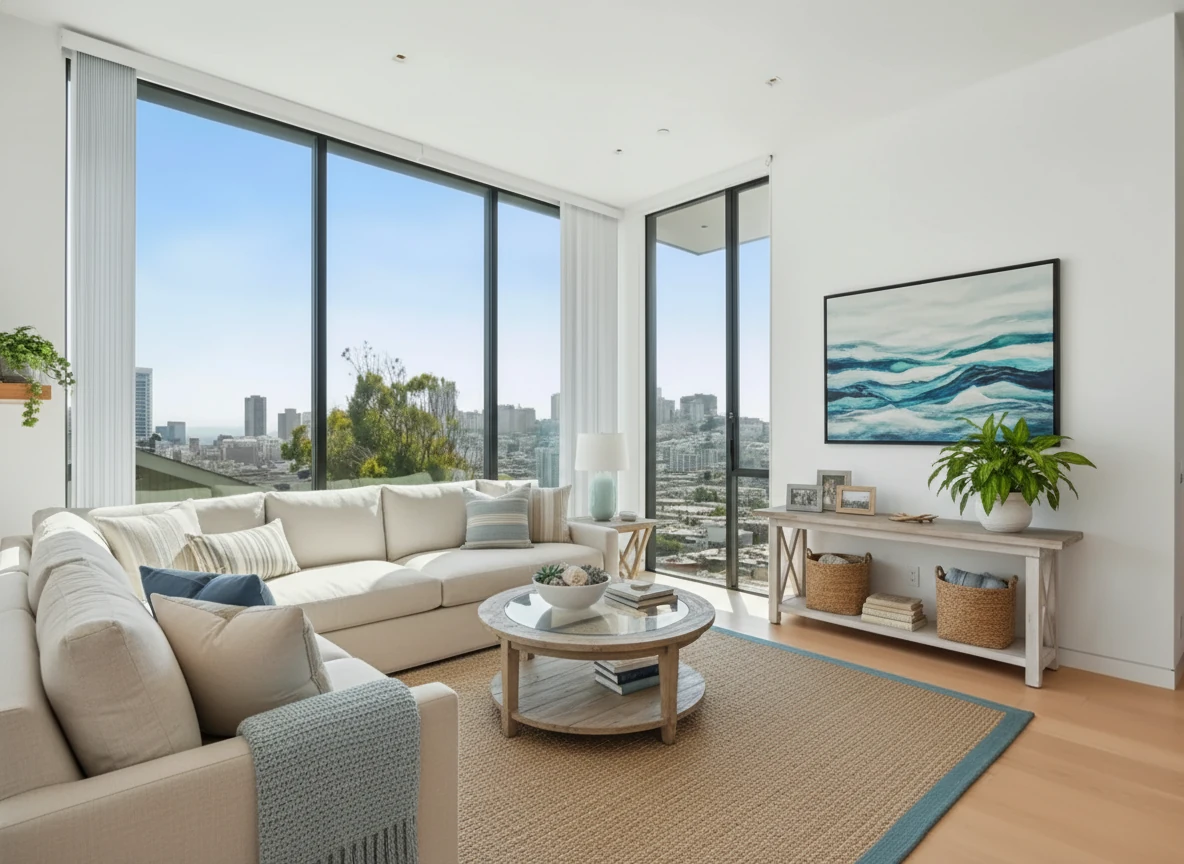
Virtual Staging • Coastal • Living Room
Bedroom photo enhancement
- Better and natural lighting, accurate white balance, better shadows and contrast.
- A single click that transforms the photo.
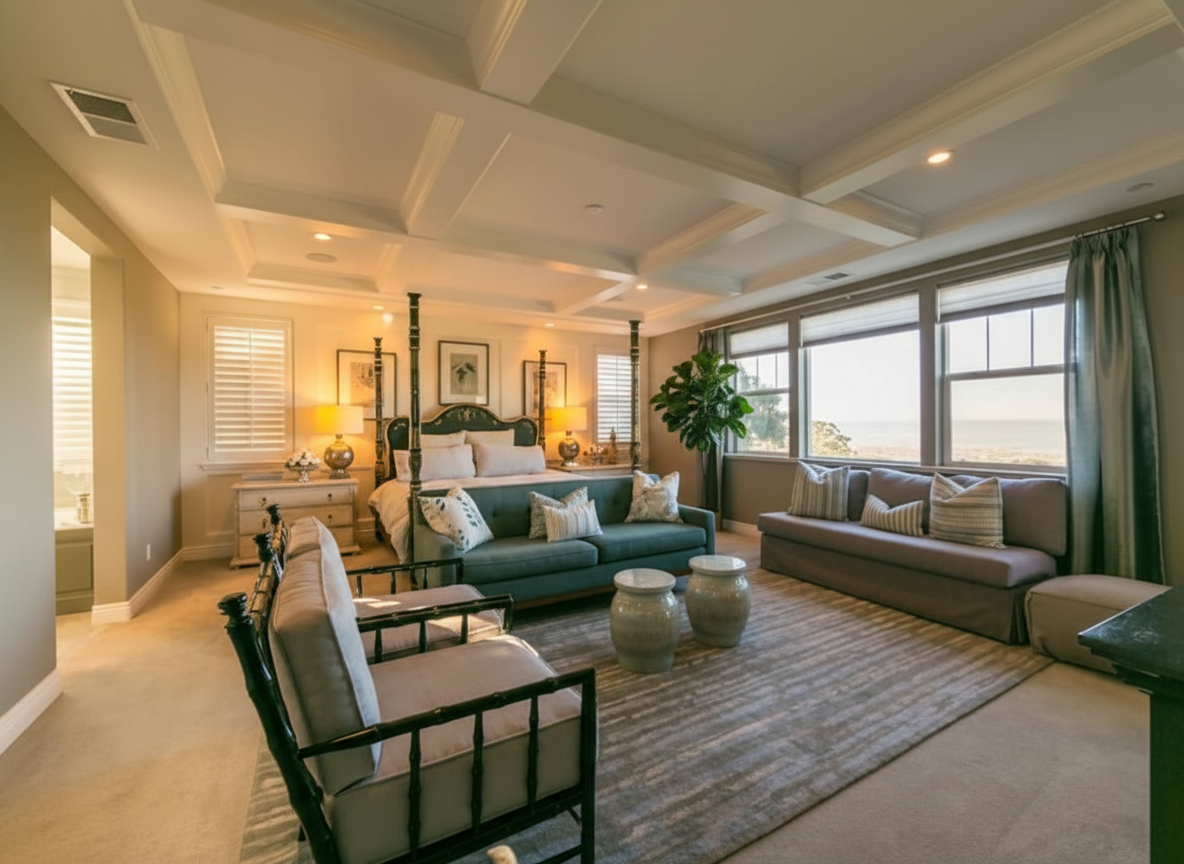

Photo Enhance • Color Correction
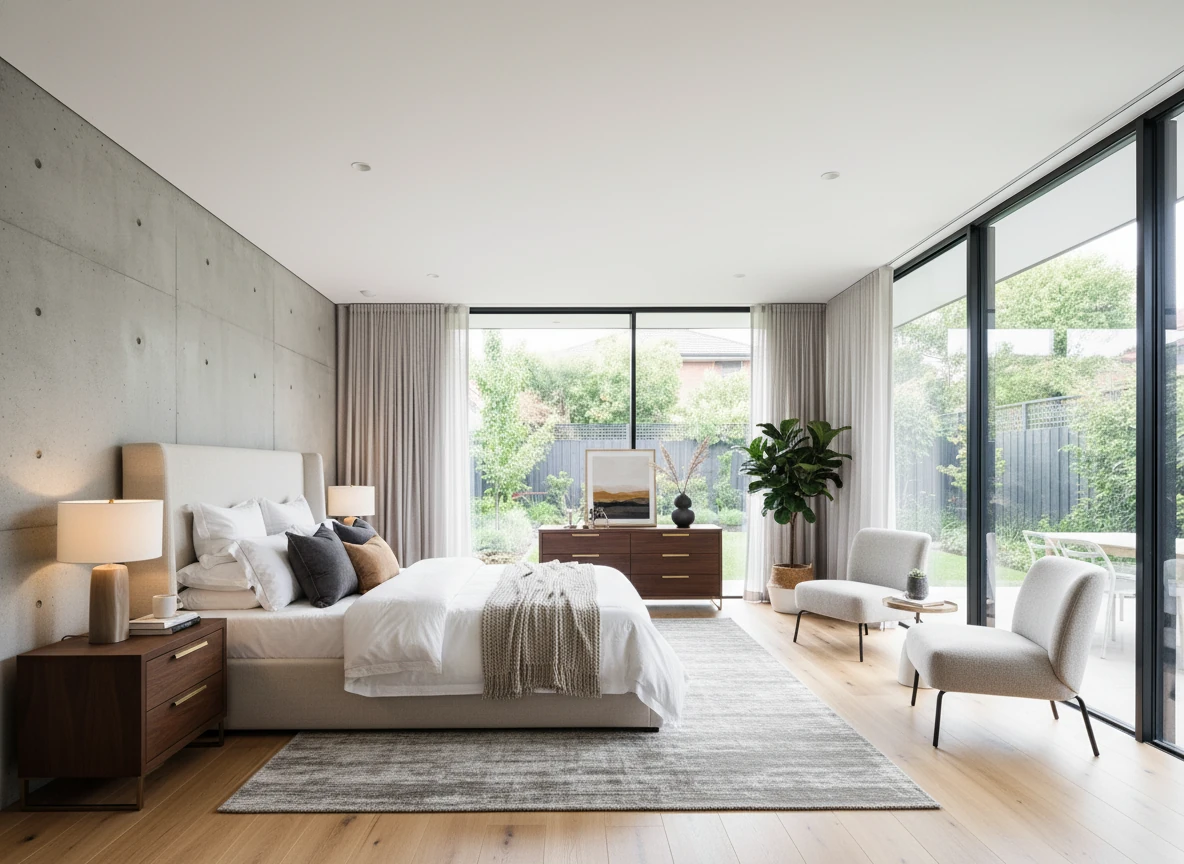
Luxury Bedroom Room in the Suburbs
- Warmer tones, layered textiles, comfortable seating.
- Great for family-oriented neighborhoods and luxury homes.
Virtual Staging • Luxury • Bedroom
For a deeper dive into how AI virtual staging works on Stager Go, read the full AI Virtual Staging Guide:
A detailed step by step guide to AI virtual staging on Stager Go
When Virtual Home Staging Works Best
Virtual staging is especially effective when:
- The property is vacant and photos look flat or cold.
- Existing furniture is outdated, but a full real-world redesign isn’t in the budget.
- You want to test different styles for marketing (e.g. more modern vs more traditional).
- You’re working on tight timelines and can’t wait for physical staging.
It’s also ideal for:
- Investment properties and rentals.
- New developments and spec homes.
- Remote sellers who can’t coordinate on-site staging.
Limitations and MLS Compliance
Virtual staging is powerful, but there are important boundaries:
- You should not change the physical structure of the room (remove walls, add windows, hide damage).
- Always disclose virtual staging in the listing description.
- Some MLS systems have specific rules about labeling virtually staged photos.
On Stager Go, with the Template Composer (on the side of the article if you are viewing on desktop), virtual staging stays within these guidelines, but you should still review them based on your own MLS rules.
How Much Does Virtual Home Staging Cost?
Costs vary a lot depending on how you do virtual staging. Here’s a high-level comparison you can skim quickly:
| Aspect | Stager Go (AI virtual staging) | Human editors / traditional virtual staging services | 3D / legacy virtual staging tools |
|---|---|---|---|
| Price per photo | $0.05-0.15 per image | $30–$80 per staged photo, sometimes higher for rush jobs | Ranges from $0.4 to $5 per image |
| Typical 3-bedroom listing (5–8 key photos) | $1-3 total with multiple retries | Roughly $200–$500+ depending on image count and provider | $4-40 per listing |
| Turnaround speed | 30s - 2 minutes per image with minimum preparation work | Typically 24–72 hours, plus revision time | Hours per project to set up scenes and adjust settings, plus render time |
| Realism of outcome | Tuned for real estate photos with styles that match buyer expectations; can look near-photographic from good input photos | Can be excellent but varies a lot by editor or team; harder to scale consistency | Often looks like a rendering unless heavily invested in assets and expertise; easier to drift into unrealistic lighting/proportions |
Choosing the Right Aspect Ratio and Output for Listings
When you generate virtually staged images, you’ll often be able to choose aspect ratios like 4:3, 16:9, or 1:1.
- Use 4:3 for most MLS and standard listing photos.
- Use 16:9 for website hero images and banner-style shots.
- Use 1:1 or vertical formats for social media and ads.
Keeping the same ratio across all staged images for a property makes the gallery feel more professional and consistent.
Is Virtual Home Staging Right for Your Listing?
If you’re asking questions like:
- "Is virtual staging real or does it look fake?"
- "Will buyers be disappointed when they see the property in person?"
- "Is this better than paying for traditional staging?"
then you’re exactly the person virtual home staging is designed for.
The safest way to answer those questions is to test it on one listing:
- Pick 3–5 key rooms.
- Generate virtually staged versions.
- Compare engagement, inquiries, and time-on-market with your previous unstaged or traditionally staged listings.
On Stager Go, you will be able to test virtual staging on one listing for free. Use the Template Composer on the right side of this article to get started now.
Next Steps
If you already have listing photos ready, the fastest way to see whether virtual staging will work for you is to:
- Upload one or two empty-room photos.
- Choose a room type and style that matches your ideal buyer.
- Generate a few variations and compare the before-after.
From there, you can decide whether to:
- Roll virtual staging out to the rest of the rooms.
- Test different styles for specific buyer segments.
- Use the images across your MLS listing, website, and social campaigns.
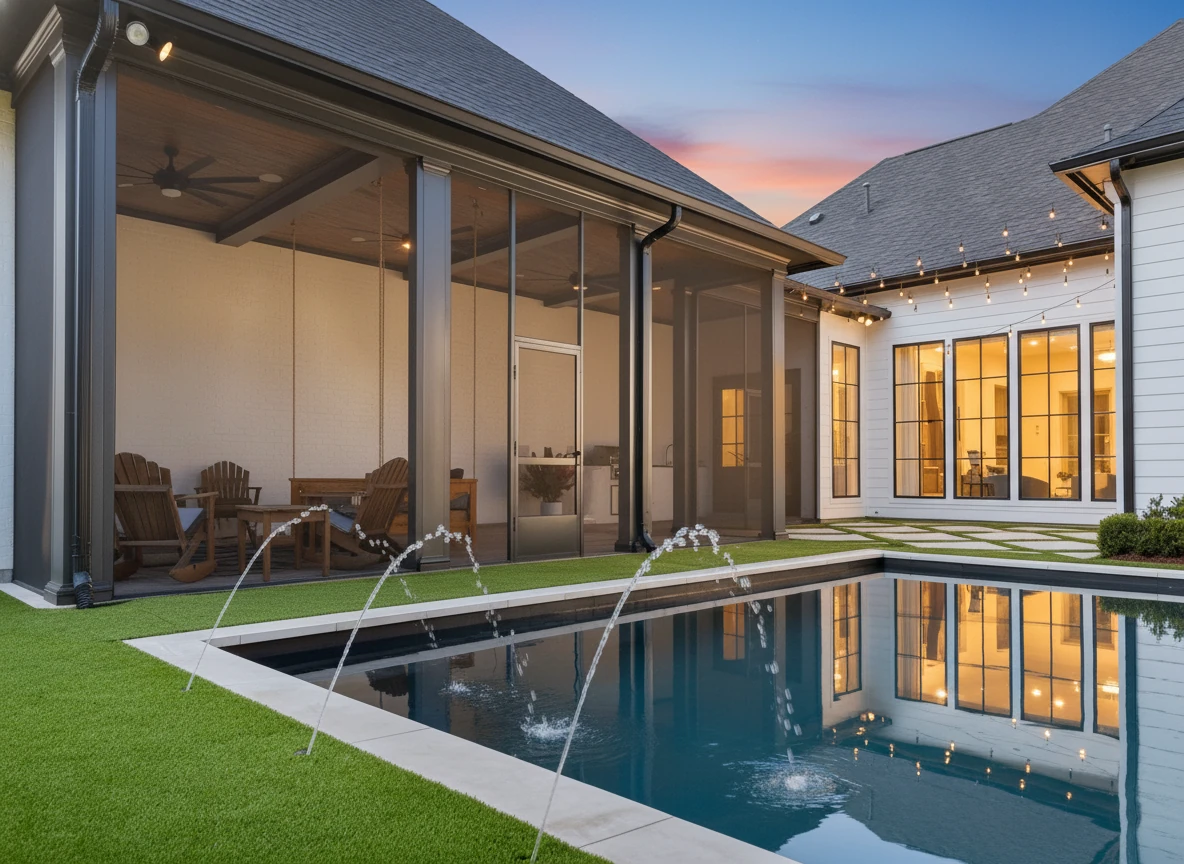
Day to Dusk • Pool Area
Summary: When AI Virtual Home Staging Makes Sense
Virtual home staging replaces physical furniture with realistic, digitally staged photos. On platforms like Stager Go, AI makes this process fast, affordable, and repeatable:
- You upload real listing photos instead of coordinating full on-site staging.
- The AI applies room-appropriate layouts and styles through a template-based workflow.
- You can test multiple looks and reuse successful setups across listings.
Compared with traditional staging and older virtual staging tools, AI staging stands out when you care about:
- Cost – far lower effective cost per photo and per 3-bedroom home.
- Speed – minutes instead of days, even when you need revisions.
- Realism – near-photographic results when you start from good input photos and respect MLS guidelines.
It’s especially useful for vacant properties, outdated interiors, and listings on tight timelines where you still want buyers to see the full potential of the space.
If you’re unsure, start with a single listing, stage a handful of key rooms, and compare how quickly that listing attracts attention versus your unstaged or traditionally staged properties.
Related Articles and Resources
If you’d like to go deeper or see more specific workflows, these pages are a good next step:
- AI Virtual Staging Guide – A detailed step by step guide to AI virtual staging on Stager Go
- AI Virtual Staging Tutorial – Step-by-step tutorial for transforming empty rooms into staged photos
- Advanced Interior Design Techniques – Professional AI interior workflows for designers and architects