Article Summary
To help you maximize the impact of virtual staging, we analyzed over 5,000 successfully staged listings and surveyed top-performing real estate agents. The result is this definitive guide of 15 virtual staging tips. We cover everything from the critical "golden hour" for photography (2-4 PM) to the psychology of style selection (matching neighborhood comps). Key takeaways: Proper photo preparation accounts for 80% of the final quality, staging key rooms only (Living, Master, Kitchen) provides the best ROI, and transparency with MLS disclosures builds buyer trust. Whether you're using AI tools like StagerGo or hiring manual designers, these best practices ensure professional, high-converting results.
15 Virtual Staging Tips & Best Practices from Experts
Virtual staging is easy to start, but mastering it can significantly impact your sales price and time on market. Based on our analysis of high-performing listings in 2026, we've compiled the essential tips that separate average staging from property-selling presentations.
Phase 1: Photography Tips (Before Staging)
The quality of your input photo dictates the quality of the staged result. No AI or human designer can fully fix a dark, blurry, or crooked original photo.
Tip 1: Lighting Is Everything
The Golden Rule: Bright, natural light produces the most realistic staging.
- Best Time: Shoot during the afternoon (2-4 PM) when sunlight is bright but not harsh.
- Action: Turn on ALL interior lights (overhead, lamps, hallway lights).
- Detail: Open all blinds and curtains.
- Why: AI models use existing light sources to generate shadows for the furniture. If the room is dark, the furniture will look flat or artificially lit.
Tip 2: Get the Right Angle
The Golden Rule: Shoot from the perspective of a buyer walking into the room.
- Position: Stand in the doorway or the corner of the room.
- Height: Hold camera at chest height (approx. 4-5 feet). Avoid high angles (security camera look) or low angles (ant's view).
- Level: Keep vertical lines straight. Use the grid feature on your phone or camera.
- Avoid: Ultra-wide angle distortion (fish-eye effect) which stretches furniture and room dimensions unrealistically.
Tip 3: Declutter First
The Golden Rule: A clean slate yields the best results.
- Action: Remove personal items, piles of mail, pet bowls, and trash cans.
- Clean: Wipe down counters and floors. Staging can add furniture, but it can't hide dirty carpets.
- Tools: If you can't remove items physically, use the AI Object Removal tool in StagerGo before staging the room.
- Why: Staging over clutter confuses AI and looks messy to buyers.
Tip 4: Show the Full Room
The Golden Rule: Context is key for realistic placement.
- Composition: Capture 3 walls if possible, or at least 2 walls and the floor/ceiling.
- Avoid: Tight crops that only show a corner.
- Why: AI algorithms need to understand the room's geometry (where walls meet floor) to place furniture in the correct perspective.
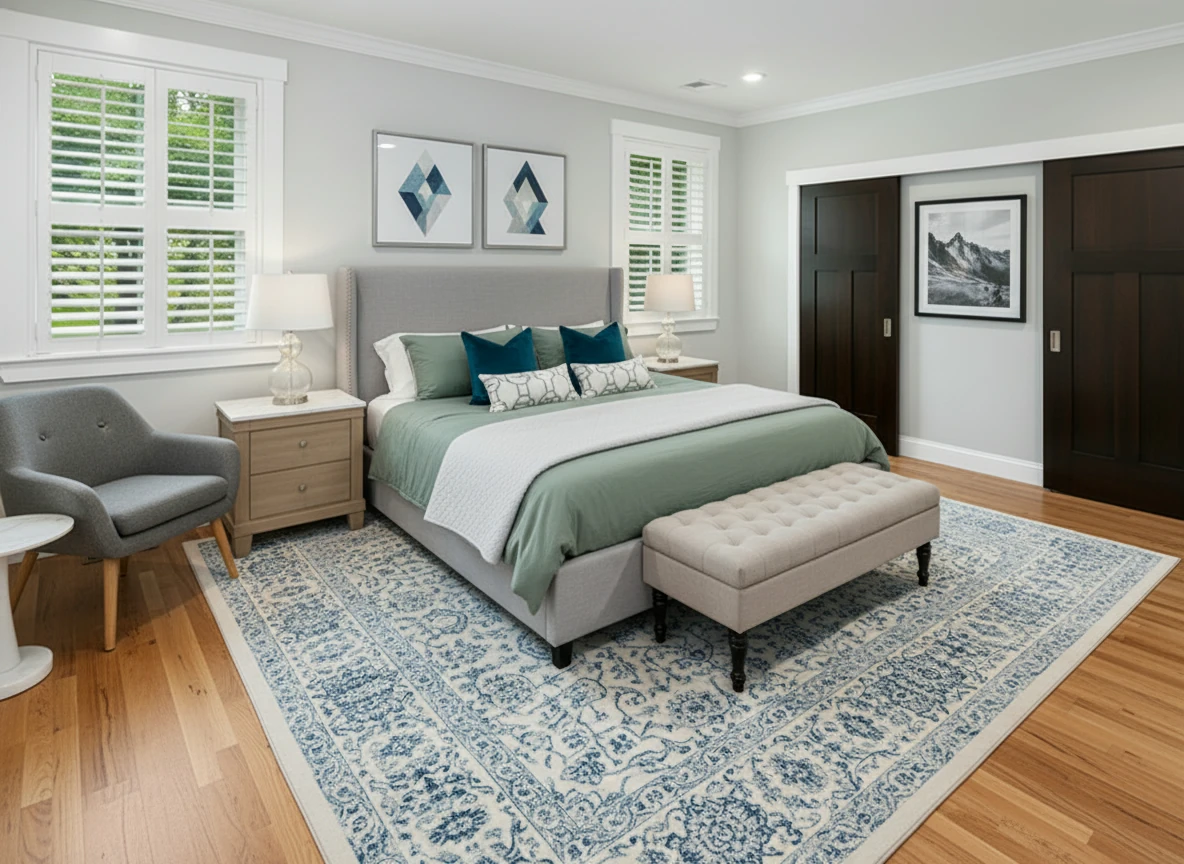
Furnish the bedroom with a soft gray upholstered bed centered on a patterned blue-and-white rug, dressed in sage bedding, two dark teal accent pillows, and geometric white bolster pillows. Add matching light oak nightstands with white tops and glass-base lamps on each side. Place a tufted beige bench at the foot of the bed. Include a gray lounge chair with wooden legs and a white round side table in the left corner. Hang two geometric art prints above the headboard and one black-and-white mountain print on the right wall. Keep light gray walls, white trim, and natural wood flooring for a bright, calm atmosphere.
Phase 2: Staging Selection Tips
Once you have great photos, the decisions you make during the staging process determine the emotional impact on buyers.
Tip 5: Match the Neighborhood
The Golden Rule: Stage for the buyer, not your personal taste.
- Research: Look at recently sold comps in the neighborhood. What style were they?
- Suburban Family Home: Use Traditional or Transitional styles.
- Downtown Condo: Use Modern or Industrial styles.
- Beachside Property: Use Coastal style.
- Mistake to Avoid: Staging a Victorian home with ultra-modern minimalist furniture usually clashes.
Tip 6: Keep Style Consistent
The Golden Rule: The listing should feel like one cohesive home.
- Action: Choose ONE primary style (e.g., "Modern") and stick to it for all rooms.
- Exception: Kids' rooms or nurseries can deviate slightly but should still feel connected.
- Tool: Use StagerGo's Template Composer to apply the exact same furniture set/style across multiple photos.
Tip 7: Consider Your Price Point
The Golden Rule: Staging should match the home's value.
- Luxury ($1M+): Use "Luxury" or "Elegant" styles. Furniture should look high-end.
- Starter Home: Use "Scandinavian" or "Modern" – clean, simple, approachable.
- Risk: Over-staging a budget property can make the home itself look cheap by comparison.
Tip 8: Less Is More
The Golden Rule: You are selling the space, not the furniture.
- Density: Select "Moderate" or "Minimal" furniture density when using AI tools.
- Flow: Ensure walkways look open (3-foot clearance).
- Focus: Don't block focal points like fireplaces, large windows, or built-ins.
- Why: Cluttered virtual staging makes rooms feel smaller, defeating the purpose.
Tip 9: Focus on Key Rooms
The Golden Rule: You don't need to stage every closet.
- Priority 1 (Must Stage): Living Room, Master Bedroom, Kitchen (if empty).
- Priority 2 (Recommended): Dining Room, Office.
- Priority 3 (Optional): Guest Bedrooms, Patio.
- Skip: Bathrooms (unless huge/empty), Utility Rooms, Hallways.
- ROI: Staging just the top 3 rooms gives you 80% of the impact for 20% of the cost.
Phase 3: Presentation Tips
How you present the staged photos on MLS and marketing materials is just as important as the images themselves.
Tip 10: Use Virtually Staged Photos Strategically
The Golden Rule: Lead with your best foot forward, but be honest.
- Order: Make the staged Living Room your primary listing photo (or first interior photo).
- Mix: Use a mix of approx. 60% staged and 40% unstaged photos in your gallery.
- Flow: Group the Staged photo followed immediately by the Empty photo of the same room so buyers can compare.
Tip 11: Always Disclose
The Golden Rule: Transparency builds trust and avoids lawsuits.
- Requirement: Most MLS boards require disclosure.
- Action: Add a "Virtually Staged" watermark or banner to the image.
- Caption: Explicitly label photos: "Living Room - Virtually Staged".
- Description: Add a disclaimer in the property description: "Some images have been virtually staged to better showcase the true potential of rooms and spaces in the home."
Tip 12: Use High-Resolution Images
The Golden Rule: Quality signals value.
- Specs: Upload images at least 1920x1080 pixels (1080p), ideally 4K.
- Platform: StagerGo allows you to download high-res images suitable for print.
- Avoid: Downloading thumbnails or low-res previews for MLS.
Phase 4: Advanced Tips
Take your virtual staging to the expert level with these pro techniques.
Tip 13: Try Multiple Versions (A/B Testing)
The Golden Rule: Data beats opinion.
- Strategy: With AI staging, it costs pennies to generate variations. Create a "Modern" version and a "Farmhouse" version.
- Test: Show both to the seller or colleagues.
- Advanced: Rotate the primary listing photo after 2 weeks if the property hasn't sold to refresh interest.
Tip 14: Combine Staging with Other Enhancements
The Golden Rule: Polish the whole image.
- Workflow:
- Image Enhancement: Brighten and color-correct the original photo.
- Item Removal: Remove that old couch or distraction.
- Virtual Staging: Add the new furniture.
- Day-to-Dusk: Convert the exterior photo to a twilight shot.
- Result: A comprehensive visual makeover that looks professional and cohesive.
Tip 15: Update Seasonal Staging
The Golden Rule: Keep the listing fresh.
- Scenario: Is your listing still on the market from summer into winter?
- Action: Re-stage the living room with a cozy fire in the fireplace or warm throws. Remove "summery" bright florals if it's December.
- Why: It signals the home is "current" and well-maintained, rather than a stale listing.
Common Mistakes to Avoid
Even pros make mistakes. Here’s a quick checklist of what NOT to do:
- ❌ Don't use fish-eye lenses that curve the walls; AI will struggle to place furniture flat against them.
- ❌ Don't stage a room with furniture that blocks the best view (e.g., a sofa covering a floor-to-ceiling window).
- ❌ Don't leave reflections unchecked. Good AI tools handle reflections, but always double-check mirrors in manual edits.
- ❌ Don't forget the outdoors. A virtually staged patio with outdoor seating can sell a lifestyle.
- ❌ Don't use low-quality renders. If it looks like a cartoon, it hurts your listing more than an empty room.
Bonus Tip: Learn from Top Listings
The best way to improve is to study success. Go to Zillow or Realtor.com and filter for "Sold" homes in your area with high prices per square foot. Look at their photos.
- What style furniture did they use?
- How much furniture did they put in the rooms?
- How did they light the photos?
Build a mental (or digital) "swipe file" of great staging examples to reference when you use StagerGo.
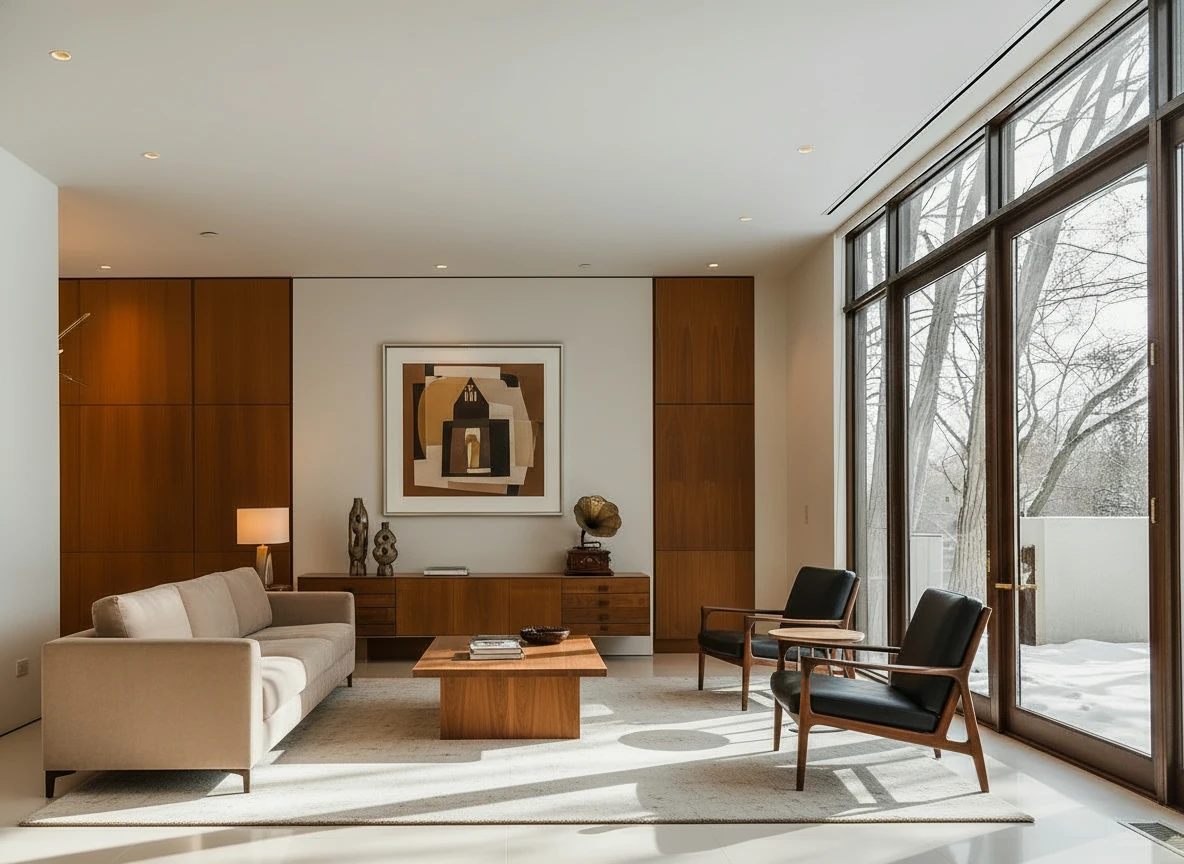
Furnish the room with a long beige sofa on the left facing a rectangular walnut coffee table (1.6m × 0.8m) centered on a light cream rug. Add two black leather lounge chairs with wooden frames opposite the sofa, one angled toward the windows. Behind, place a low walnut sideboard spanning the width between two tall built-in wood panels, decorated with sculptural vases and a gramophone. Mount a large abstract artwork above the sideboard. Finish with a warm table lamp on the side table near the sofa, soft downlights, and full-height glass doors along the right wall. Make sure the placement of furnitures are reasonable based on the room layout
Conclusion
Virtual staging is one of the highest-ROI activities a real estate agent can do. By following these 15 tips—focusing on lighting, style matching, and proper disclosure—you can elevate your listings from "vacant" to "dream home" in minutes.
Ready to practice these tips? StagerGo makes it easy to apply these best practices with AI-powered tools that handle the heavy lifting of lighting and perspective for you.
Try StagerGo Free – Stage your first room in under 60 seconds.
Frequently Asked Questions
What is the most important tip for virtual staging? Start with a high-quality, well-lit photo. No amount of editing can perfectly fix a dark, blurry original image.
Should I stage every room? No. Focus your budget and time on the Living Room, Master Bedroom, and Kitchen. These are the rooms that sell homes.
Is it okay to remove permanent fixtures virtually? No. Never remove permanent features like wall heaters, radiators, or structural columns. That misrepresents the property and can lead to legal issues. Only remove movable items (furniture, clutter).
How much does professional virtual staging cost? Manual services cost $30-$75 per image. AI platforms like StagerGo cost a fraction of that (approx. $0.50-$1.00 per image) while offering professional quality.
Can I stage a room myself without hiring a service? Yes! AI platforms like StagerGo are designed for DIY staging. You upload your photo, select a style, and get results in seconds. No design experience needed—the AI handles furniture placement, lighting, and perspective automatically.
What file format should I use for virtual staging? JPEG or PNG at the highest resolution your camera produces. Avoid compressing images before upload—let the staging platform optimize them. Most platforms accept files up to 20MB.
Equipment & Camera Settings Guide
The right equipment doesn't have to be expensive, but knowing what settings to use makes a massive difference.
Camera Options (Best to Budget)
Professional DSLR ($1,000-$3,000)
- Best For: Full-time agents, luxury listings
- Settings: 24mm lens, f/8-f/11 aperture, ISO 400-800, HDR bracketing
- Advantage: Maximum control, best low-light performance
Mirrorless Camera ($500-$1,500)
- Best For: Serious agents who want quality without bulk
- Settings: Kit lens 18-55mm at widest, auto-HDR mode
- Advantage: Lighter than DSLR, excellent image quality
iPhone 13+ or Samsung S21+ ($800-$1,200)
- Best For: Most agents—80% of the quality at a fraction of the cost
- Settings: Use native camera app, enable grid lines, HDR on
- Advantage: Always with you, surprisingly good results
Budget Smartphone ($200-$500)
- Best For: New agents, rental properties
- Settings: Clean the lens, use natural light, avoid digital zoom
- Advantage: Gets the job done for standard listings
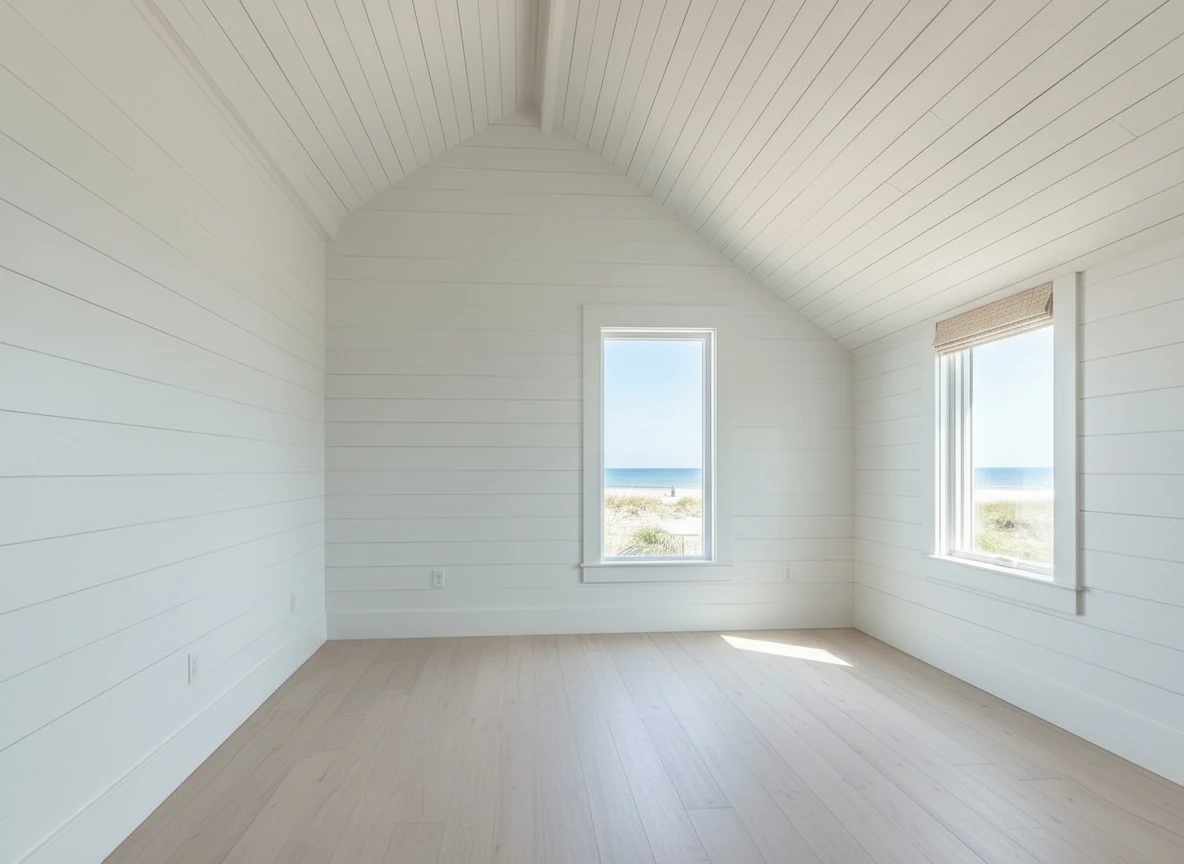
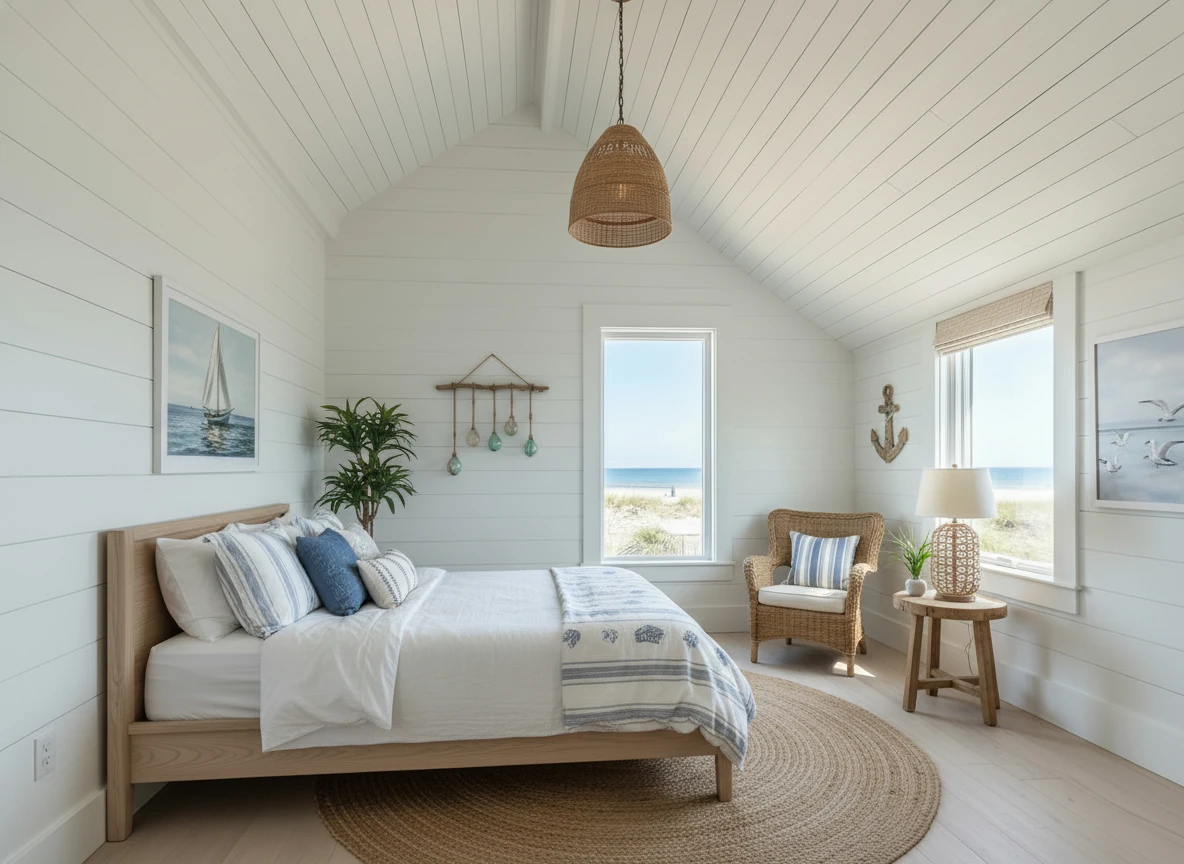
Create a photo of the same bedroom, virtually staged in a Coastal style. Include a light wood bed frame against the wall on the left, white and blue bedding, a jute rug under, and nautical-themed decor. A chair against the corner to the right. Some paintings on the wall, and a 1-2 green plants around the room, and a ceiling light in the middle of the room
Critical Camera Settings
Focal Length: 24-35mm (or "0.5x" on phone)
- Why: Captures the full room without distortion
- Avoid: Ultra-wide (16mm) creates fish-eye effect
Aperture: f/8 to f/11
- Why: Keeps entire room in focus (front to back)
- Avoid: f/2.8 creates blurry backgrounds
ISO: 400-800 indoors
- Why: Balances brightness without grain
- Avoid: ISO 3200+ creates noise that AI can't fix
White Balance: Auto or Daylight
- Why: Keeps colors natural
- Avoid: Tungsten (makes everything blue)
Room-Specific Staging Strategies
Different rooms require different approaches. Here's what works for each space:
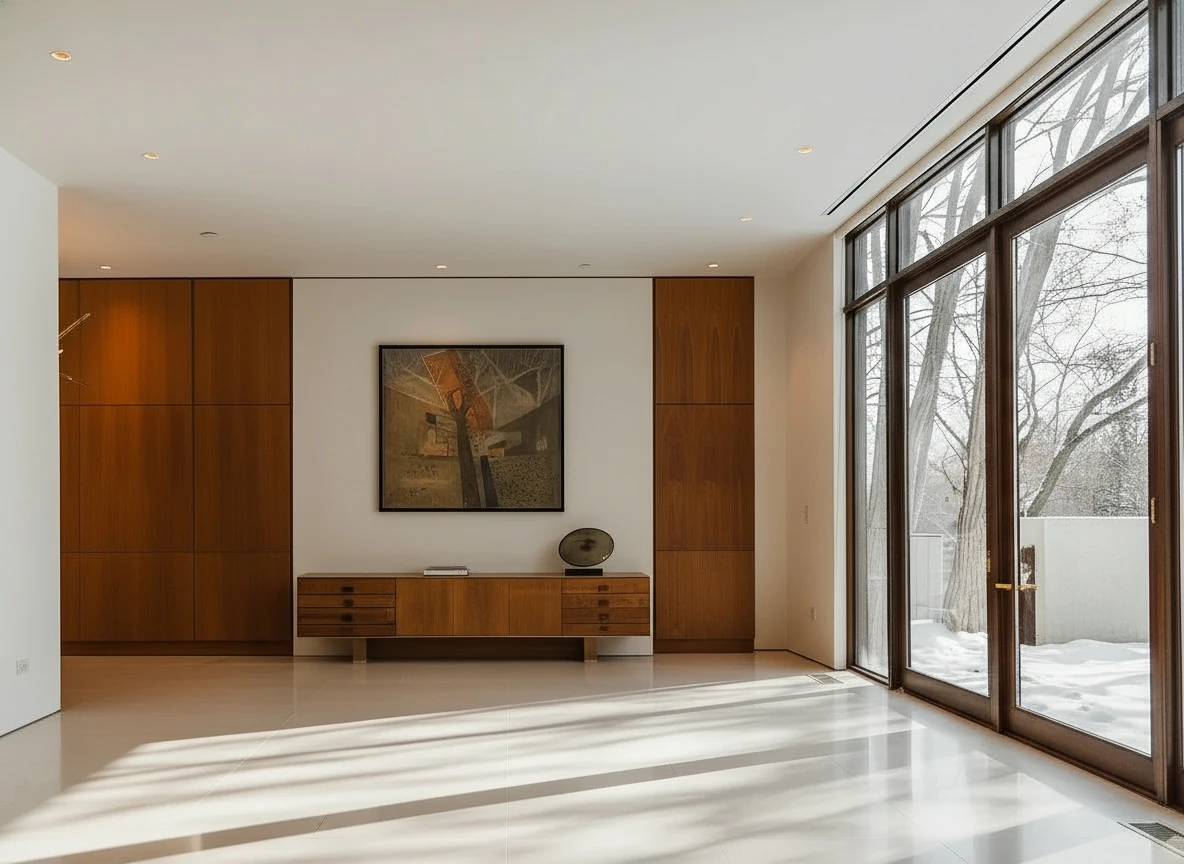
Living Room Staging Tips
The Challenge: This is the "hero shot" of your listing—it needs to wow buyers immediately.
Best Practices:
- Focal Point: Orient furniture toward the fireplace, TV wall, or best window view
- Seating: Include a sofa + 2 chairs OR sectional. Avoid lone loveseat (looks cheap)
- Coffee Table: Always include one—it anchors the space
- Accessories: Add 2-3 items: throw pillows, area rug, wall art, plant
- Lighting: Stage a floor lamp or table lamp if the room has dark corners
Style by Price Point:
- $200K-$400K: Modern or Transitional (broad appeal)
- $400K-$800K: Transitional or Contemporary (sophisticated)
- $800K+: Luxury or Custom (high-end materials)
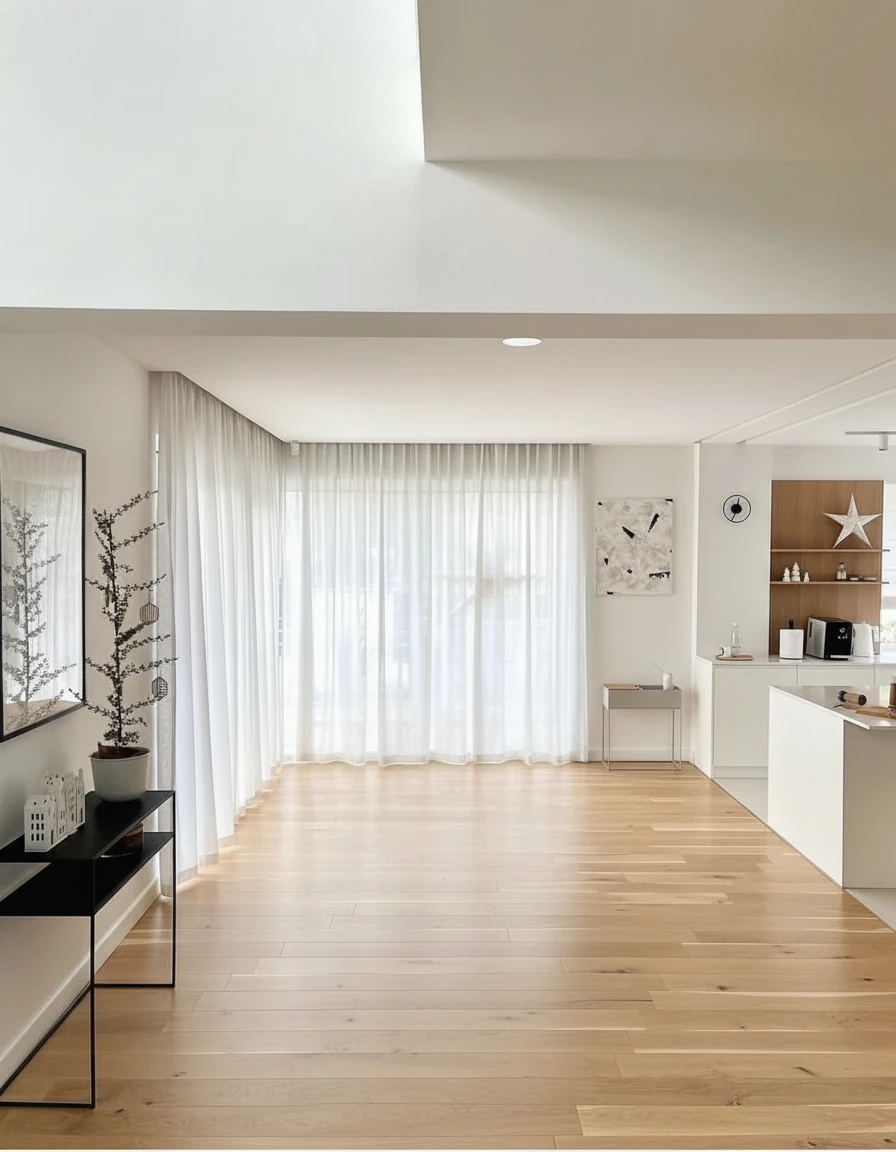
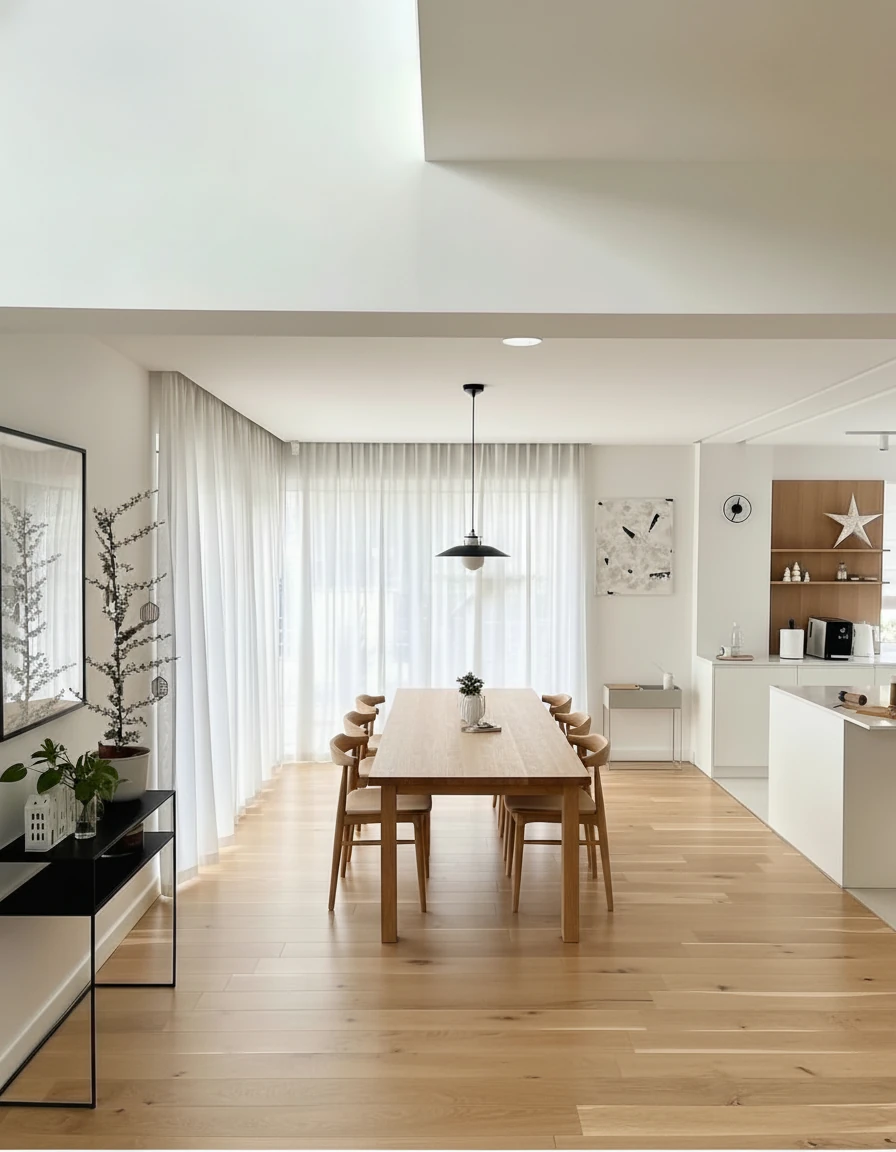
Furnish the dining area with a long natural oak dining table (3m × 1m) centered on the wooden floor, surrounded by eight matching curved-back oak chairs. Above the table, install a pair of minimalist black-and-white pendant lights aligned along the centerline. Add sheer white curtains across the full window wall for soft daylight diffusion. Place a slim black console with potted plants and small decor on the left wall, and keep the adjoining kitchen open with white cabinetry and oak shelving for a warm, cohesive look.
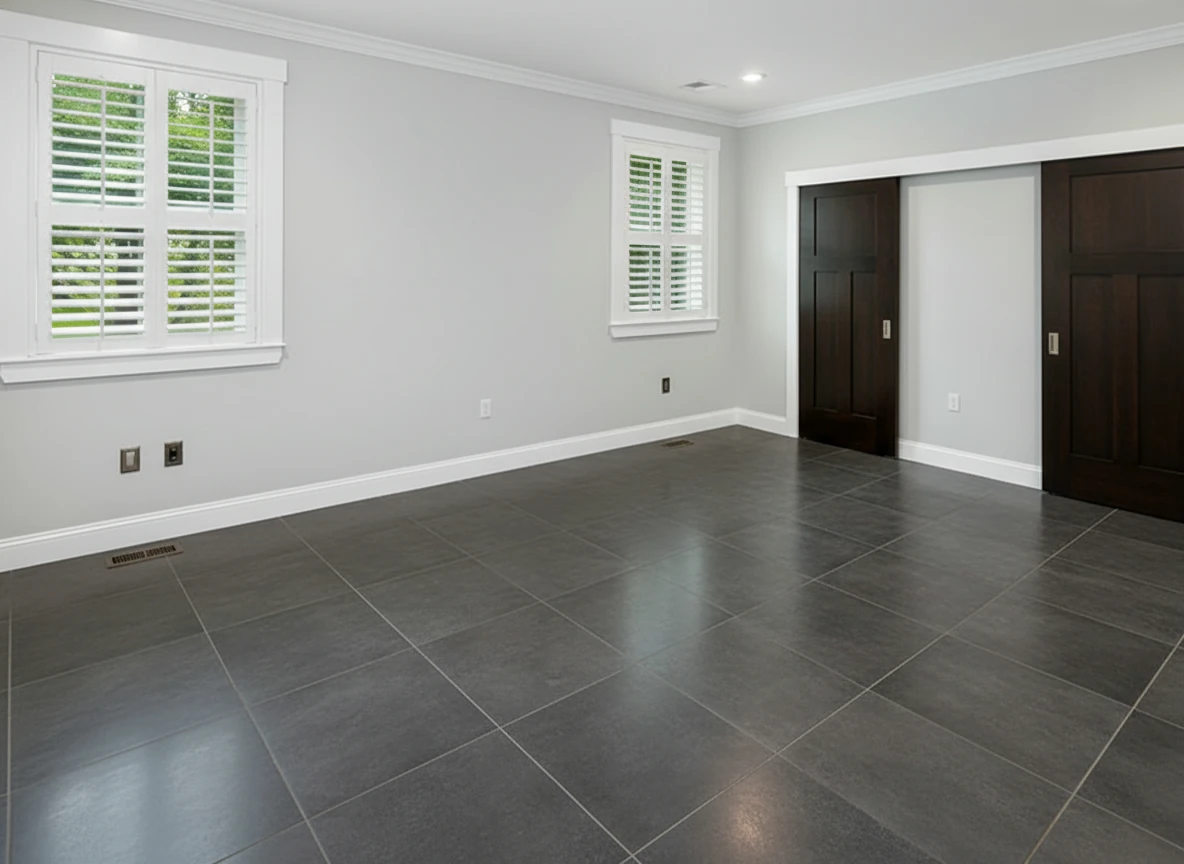
Master Bedroom Staging Tips
The Challenge: Create a relaxing retreat that feels spacious, not cramped.
Best Practices:
- Bed Placement: Center the bed on the longest wall
- Nightstands: Include matching nightstands (symmetry = luxury)
- Bedding: Use neutral colors (white, gray, beige) for broad appeal
- Avoid: Busy patterns, bold colors, or themed decor (nautical, sports)
- Extras: Add a bench at foot of bed if space allows, artwork above headboard
Common Mistake: Over-furnishing. If the room is under 12x12 feet, skip the dresser and just do bed + nightstands.
Kitchen Staging Tips
The Challenge: Kitchens are usually already furnished with cabinets and appliances. Virtual staging here means adding lifestyle touches.
Best Practices:
- Countertops: Add a bowl of fruit, coffee maker, or small plant
- Island: If there's an island, add 2-3 bar stools
- Table: If there's a breakfast nook, add a small table with 2-4 chairs
- Avoid: Staging over clutter—clean counters first
When to Skip: If the kitchen is already furnished and clean, you may not need virtual staging at all.
Dining Room Staging Tips
The Challenge: Show the space can host gatherings without feeling formal or stuffy.
Best Practices:
- Table Size: Match the room—6-seater for small rooms, 8-10 seater for large
- Centerpiece: Add a simple centerpiece (vase, bowl, candles)
- Lighting: If there's a chandelier, make sure it's on in the photo
- Avoid: Overly formal place settings (looks like a museum)
Alternative Use: If the dining room is small or awkwardly shaped, consider staging it as a home office instead.
Home Office Staging Tips
The Challenge: Remote work is huge—buyers want to see a functional workspace.
Best Practices:
- Desk: Place desk facing the window or against a wall with good light
- Chair: Include an ergonomic office chair (not a dining chair)
- Shelving: Add a bookshelf with books and decor
- Extras: Desk lamp, laptop, small plant
Hot Tip: If the home has a "bonus room" or "flex space," staging it as an office can increase perceived value by 5-10%.
MLS Compliance & Legal Guidelines
Virtual staging is legal and widely accepted, but you must follow disclosure rules to avoid liability.
MLS Disclosure Requirements
Mandatory in Most States:
- Image Watermark: Add "Virtually Staged" text overlay
- Photo Caption: Label each staged photo in the MLS system
- Listing Description: Include disclaimer like: "Some photos have been virtually staged to illustrate the property's potential."
Check Your Local MLS: Rules vary by region. Some require:
- Mixing staged and unstaged photos (e.g., 1 staged, 1 unstaged per room)
- Specific watermark placement (top corner vs. bottom)
- Font size minimums for watermarks
Penalty for Non-Disclosure: Fines from MLS ($500-$5,000), potential lawsuit from buyer, loss of license in extreme cases.
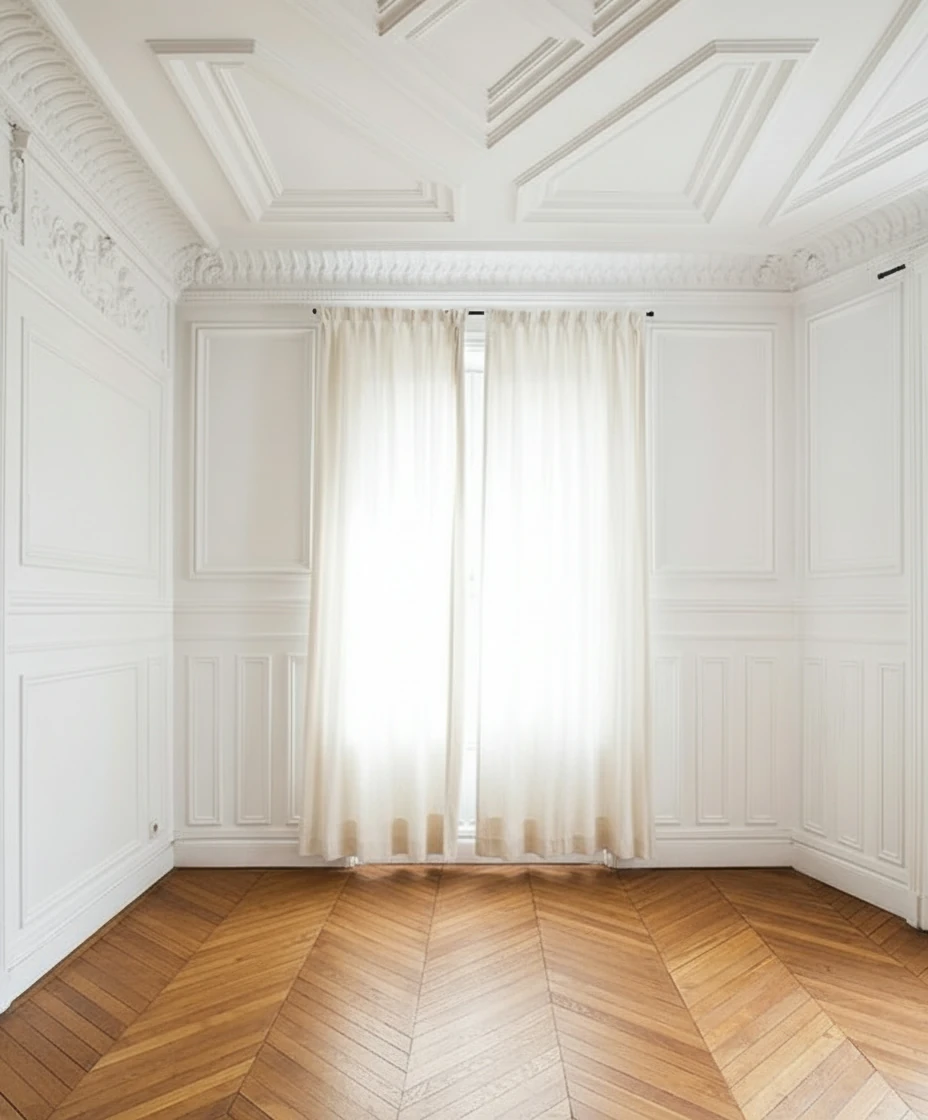
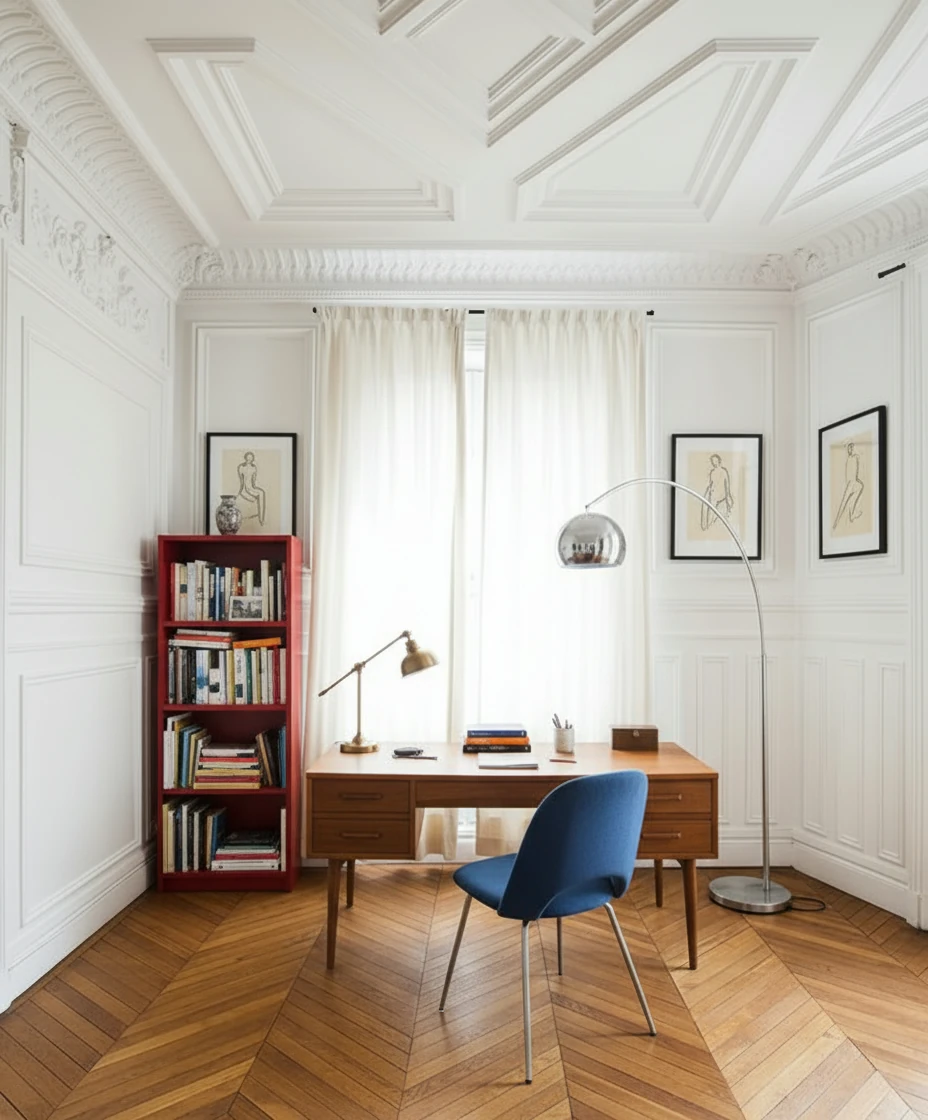
Furnish the study with a mid-century wooden desk centered in front of tall, cream-draped windows, paired with a blue-upholstered chair featuring metal legs. Place a vintage desk lamp and neatly arranged books and stationery on the desk. To the left, add a red open bookshelf filled with books and decorative objects. Include a tall arched chrome floor lamp curving over the desk for dramatic lighting. Hang two framed figure drawings symmetrically on either side of the window. Keep the ornate white paneled walls and chevron wood floor exposed for a refined Parisian atmosphere.
What You CAN and CANNOT Change
✅ Allowed:
- Adding furniture, decor, and accessories
- Changing wall paint color
- Adding rugs and window treatments
- Enhancing lighting (brightening)
- Removing movable items (old furniture, clutter)
❌ NOT Allowed (Misrepresentation):
- Removing permanent fixtures (radiators, built-ins, columns)
- Adding windows or changing window size
- Removing walls or changing room layout
- Hiding structural damage (cracks, water stains)
- Changing flooring material (hardwood to tile)
Gray Area (Use Caution):
- Updating countertops (granite to quartz)—disclose if you do this
- Changing light fixtures—usually okay if disclosed
- Adding virtual renovations (new cabinets)—must be clearly labeled as "Concept" or "Potential"
Seasonal Staging Strategies
Adjust your staging approach based on the time of year to maximize emotional appeal.
Spring Staging (March-May)
Buyer Mindset: Fresh starts, new beginnings, family-focused
Staging Approach:
- Colors: Soft pastels, light greens, whites
- Accessories: Fresh flowers, open windows (if photo allows)
- Outdoor Spaces: Stage patios and decks—buyers are thinking about summer
Hot Tip: Spring is peak real estate season—competition is high. Make your staging stand out with unique style choices.
Summer Staging (June-August)
Buyer Mindset: Vacation mode, relaxation, entertaining
Staging Approach:
- Colors: Bright whites, coastal blues, sunny yellows
- Accessories: Outdoor furniture, beach-inspired decor
- Lifestyle: Show the home as a retreat
Hot Tip: Emphasize outdoor living spaces—stage the backyard, pool area, or balcony.
Fall Staging (September-November)
Buyer Mindset: Cozy, family gatherings, preparing for holidays
Staging Approach:
- Colors: Warm neutrals, burnt orange, deep reds
- Accessories: Throw blankets, pillows, fireplace (if applicable)
- Lighting: Emphasize warm, ambient lighting
Hot Tip: Fall buyers are serious—they want to close before the holidays. Stage for emotional connection.
Winter Staging (December-February)
Buyer Mindset: Comfort, warmth, practicality
Staging Approach:
- Colors: Deep blues, grays, warm woods
- Accessories: Cozy textures (faux fur, knits), fireplace focal point
- Lighting: Maximize light in photos—winter days are short
Hot Tip: Winter inventory is low—your listing will get more attention. Use staging to overcome the "cold, empty house" vibe.
ROI Analysis: Which Rooms to Prioritize
Not all rooms deliver equal return on investment. Here's the data-driven priority list:
High ROI Rooms (Stage These First)
1. Living Room (ROI: 15:1)
- Why: First impression, most-viewed photo
- Cost: $0.50-$2 per image
- Impact: 40% of buyers say living room staging influenced their offer
2. Master Bedroom (ROI: 12:1)
- Why: Emotional connection, personal retreat
- Cost: $0.50-$2 per image
- Impact: 35% of buyers prioritize master bedroom in decision
3. Kitchen (ROI: 10:1)
- Why: Heart of the home, high buyer interest
- Cost: $0.50-$2 per image (or $0 if already furnished)
- Impact: 30% of buyers say kitchen is a dealbreaker
Medium ROI Rooms (Stage If Budget Allows)
4. Dining Room (ROI: 6:1)
- Why: Shows entertaining potential
- Cost: $0.50-$2 per image
5. Home Office (ROI: 8:1)
- Why: Remote work trend, adds perceived value
- Cost: $0.50-$2 per image
6. Outdoor Spaces (ROI: 7:1)
- Why: Lifestyle appeal, especially in warm climates
- Cost: $0.50-$2 per image
Low ROI Rooms (Usually Skip)
7. Guest Bedrooms (ROI: 3:1)
- Why: Buyers care less about secondary bedrooms
- Exception: If it's a unique space (nursery, teen room)
8. Bathrooms (ROI: 2:1)
- Why: Hard to stage effectively, buyers focus on fixtures
- Exception: Luxury master bath with soaking tub
9. Utility Rooms (ROI: 1:1)
- Why: Functional spaces don't benefit from staging
Advanced Techniques for Competitive Markets
In hot markets, basic staging isn't enough. Use these advanced tactics to stand out:
Technique 1: Lifestyle Staging
What It Is: Staging that tells a story about how the buyer will live in the space.
Example:
- Basic Staging: Living room with sofa, chairs, coffee table
- Lifestyle Staging: Living room with sofa, coffee table with books and wine glasses, throw blanket draped casually, family photos on shelf
Why It Works: Buyers imagine themselves in the space, not just viewing furniture.
Technique 2: Dual-Purpose Room Staging
What It Is: Showing how a flexible space can serve multiple functions.
Example:
- Bonus Room: Stage half as home office, half as yoga/exercise space
- Dining Room: Stage with desk in corner to show it can be office + dining
Why It Works: Increases perceived value by showing versatility.
Technique 3: Luxury Staging for High-End Listings
What It Is: Using premium furniture styles and accessories to match the home's price point.
Best Practices:
- Furniture: Select "Luxury" or "Elegant" styles in AI tools
- Accessories: Add high-end touches (designer lamps, art, sculptures)
- Consistency: Every room should feel cohesive and upscale
Why It Works: Buyers at this price point expect a certain level of presentation.
Tools & Resources
Recommended Virtual Staging Platforms:
- StagerGo – AI-powered, multiple models, fastest turnaround
- Virtual Staging AI – Budget-friendly, simple interface
- BoxBrownie – Manual service, high quality, slower
Photography Apps:
- VSCO – Color correction and enhancement
- Snapseed – Free, powerful editing tools
- Adobe Lightroom Mobile – Professional-grade editing
Learning Resources:
- YouTube: Search "real estate photography tips"
- Zillow Blog: Articles on staging best practices
- NAR (National Association of Realtors): Staging statistics and research
Final Checklist: Before You Upload to MLS
Use this checklist to ensure your virtually staged photos are ready for prime time:
- Photos are well-lit (2-4 PM shooting time)
- Vertical lines are straight (no tilted walls)
- Clutter has been removed or edited out
- Staging style matches neighborhood comps
- All rooms use consistent style
- "Virtually Staged" watermark is visible
- Photo captions include "Virtually Staged" label
- Listing description includes disclosure statement
- High-resolution images (1920x1080 minimum)
- Mix of staged and unstaged photos (60/40 ratio)
Conclusion
Virtual staging is no longer optional in competitive real estate markets—it's expected. By following these 15 expert tips and best practices, you'll create listings that capture attention, generate more showings, and sell faster.
The key takeaway: Great virtual staging starts with great photography. Invest time in lighting, angles, and preparation, and the staging will elevate your listing from "vacant" to "dream home."
Ready to put these tips into action? Try StagerGo's AI virtual staging tool below. Upload your photo, select a style, and see professional results in under 60 seconds.
Related Resources
- What Is Virtual Staging? – Complete beginner's guide
- Virtual Staging Cost Guide – Pricing breakdown and ROI analysis
- Virtual Staging Before & After Gallery – See real transformations
- Best Virtual Staging Software – Platform comparison